Showing posts with label Rice and Grains. Show all posts

Friday, October 1, 2010

Mansaf -Jordanian National Food


Mansaf, the traditional dish of Jordan is comprised of "Jameed" - drenched rice, meat and Shrak bread.
Jameed is a special kind of sun dried yoghurt, that is generally fist-sized and hard as a rock. It is later broken down and cooked, then served in generous quantities alongside the rice and meat. Since, we do not get Jameed easily in Western countries here, I did not try it until when one of my Jordanian friends suggested that i make a substitute for it by mixing Yogurt, curd cheese with a powdered essence of Lemon. Though the taste would be a little different from the traditional Mansaf, it definitely was a rich feast  ! Someday, would defnitely love to try it with the actual "jameed" !


Ingredients for 2-3 persons

Lamb - 1 kg
Basmati rice - 2 cup (washed, soaked in water for 15 minutes and drained).
Ghee - 3 tbsp
Onion - 1 (cutted to squares)
Arabic loaves of bread called Shrak or Pita
Parsley - 1 cup (finely chopped)
Salt
Pepper - 2 tsp
cloves - 3
spices (according to your taste)
Yogurt - 500 gms
Curd Cheese - 2 tbsp
Powdered essence of Lemon - 1/2 tsp (available in Turkish shops as Limon Tuzu)
Water - 1 litre

Preparation
1. Slow cook the lamb in cold water with salt and pepper. Bring to boil, simmer it and cook for 30 minutes.
2. Remove the meat and reserve the broth.
3. In a separate bowl, add Yogurt, curd cheese, powdered essence of lemon and whisk it well.
4. Mix this Yogurt mix with the reserved broth. Let it boil.
5. Add the meat, onions, salt, spices, cloves and simmer until the meat is tender and cooked well with the broth.
6. In a separate pan, heat the ghee and saute the rice for 2 minutes until the grains are coated completely with the ghee.
7. Add enough water and cook the rice until fluffy. (Please read the instructions in the packet of the rice used, as regards to the water).
8. Take a large serving plate. Spread out the one or two loaves of bread on it. 
9. Pour over a laddle full of the Yogurt broth over the bread.
 10. Put the cooked rice on the bread.
 11. Arrange pieces of the meat on the rice bed. Pour over the Yogurt soup generously all over.
 12. Sprinkle roasted pine nuts and/or Almonds and parsley.

Serve Mansaf along with a bowl of the Yogurt soup which could be poured as and when you are enjoying the feast. Its a single plate meal. All the members gather around and eat from this single plate with hand.


This festive rice recipe goes to the Festive rice event hosted by Torview

Tuesday, September 28, 2010

Maqloobeh


Maqloobeh is one of the most famous Palestinian dishes. Each village and town in Palestine has its own version of it. Its fame is spread out to many Middle Eastern countries as well. Maqloobeh in Arabic means "Invert or Upside down" for the last process of flipping the pot over in a big platter for serving. The most original recipe is prepared with Lamb chunks/Chicken and fried eggplants. Many use cauliflower, carrots, potatoes. You could make it completely veggie too. Its usually prepared on special occasions.
I had my first Maqloobeh with Eggplants and Potatoes in one of my Palestinian friends place 5 years back...aah that was so delicious that eversince wanted to give it a try. But its only now for the first time I could actually prepare it !
Well, my version of Maqloobeh has Chicken, fried eggplants, potato with Rice. I didnt have any special occasion for preparing it and so went ahead, prepared it and made itself an occassion :)

I have tried to picture all the steps involved for easy understanding. Believe me, it was so much fun preparing it. Please be prepared for left overs. The display is everything in this recipe. So you need to prepare this minimum quantity which serves for atleast 3-4 people.  Or you could invite your friends over for dinner, or altogether skip preparing dinner the next day  as we often do when we have left over Biriyani ;)
 Ingredients
Chicken - 750gms to 1 kg(or approximately 6-7 big pieces)
Eggplants - 2 (large)
Potatoes -3-4 (optional) - sliced
Onions - 2 (medium size, chopped)
Basmati rice - 3.5 cups
Oil - 1.5 cups
Garlic cloves - 5-6
Water - about 7 cups
Pine nuts or almonds - roasted
Kitchen Tissues
A large serving plate
Spices:
Black pepper - 2 tsp (or more, according to your taste)
Cumin powder - 2 tsp
Cinnamon powder - 3 tsp
Cardamom powder - 2 tsp
Turmeric powder - 2 tsp
All Spice - 2 tsp (Arabic spice. I couldn't get that, so I went ahead without using it)
Salt - to taste

Method 
1. Marinate the chicken using 1 tsp of all the spices for half an hour.
2. Cut the eggplant in 1 cms slices and soak in salted water for half an hour. This prevents the browning of the slices which eventually causes bitterness.
3. Take each slices and drain the water using a kitchen tissue.
4. Heat the oil in a large bottomed pan and deep fry the eggplant until golden brown. After frying, remove the excess oil using kitchen tissue.
5. In the same oil, fry the potatoes until crispy golden brown. Remove them. Drain excess oil.
 6. Fry the chopped onions and garlic cloves until crispy brown. Do not over fry them, lest they give bitterness. Remove from oil. Drain the excess oil using a kitchen tissue.
 7. Fry and brown the chicken pieces in the same oil.
8. When the chicken is more than half done, add the water and cook the chicken in a medium flame for about 10-15 minutes. The spices released by the chicken gets into this water. Take out and separate the chicken pieces from the broth. This broth is reserved and used for cooking the rice.

Till now, its only the preparation process. Now comes the actual fun part of assembling them in layers!
Are you still with me ???? Then...... lets proceed.........

1. Take a large bottomed pan in which you desire to cook the rice. I used the electric rice cooker and it was absolutely the best ! If you dont have it, no worries, you can still get it right in a normal cooking dish.
2. Place the chicken pieces tightly and closely and try to cover the gaps if possible.
 3.Cover the chicken layer with the eggplant layer.
  4. Now comes the potato layer over this.
5. Then the fried onions and fried garlic...
 6. Then comes the rice, which was soaked in water for 10 minutes and drained well.
 7. Sprinkle turmeric powder over the rice.
8. Sprinkle all the rest of the spices and salt(required enough for the quantity of rice used)
Are you still there ?????????......well, just wanted to make sure ;)

9. Cover the layers with a small serving plate. You will know the reason in the next step !
10. Now, gently pour over the reserved chicken broth (6 cups) over this plate. This plate prevents all the inner spices and onions from coming out while you are pouring the broth over the rice, thereby the contents and the arranged layers are undisturbed !
11. Now, slowly take out the plate and with a spoon gently press the rice grains to make sure they are immersed into the broth completely and that the spices are a little mixed. Please do it lightly and only superficially and not disturbing the underlying layers.
12. Cook it in a rice cooker. If you are cooking it in a normal dish, cook the rice in a high heat until the broth starts boiling. Then lower the heat, use a heat protection disk if you like to prevent burning, cook the rice for about 30 minutes until the rice gets fluffy. (The cooking time depends greatly on the rice used. Please refer to the package for instructions as to how much water it needs. You can add a little more water while cooking, if needed.).
Please DO NOT try to mix the rice while cooking. The layers have to be intact and not disturbed until you get to spoon it for eating ! Remove from heat, cover and set aside the rice for 15 minutes.
Now comes the "opening ceremony" of this whole cooking event ......

1. Place a large serving plate that would fit to your cooking dish as shown below.
 
 2. Quickly but carefully flip the dish in the serving plate. You could get the help from your husband or someone if you want and thats what I did :). Tap the bottom of the dish lightly and remove it slowly and carefully.

and Voila !
 Garnish with roasted pine nuts or cashews or almonds.
Serve Maqloobeh with plain yogurt or a salad. The whole family gets to eat this Festive rice from this single plate!!!

Enjoy !

Thank you for your patience in reading such a long post :)

This festive rice recipe goes to the Festive rice event hosted by Torview and to Visual Treat by Creative Sanyukta.

Friday, August 6, 2010

Bulgur Pilavi


Bulgur has been a major staple in many rural areas in Turkey; during the Ottoman Period, the rice was a very precious commodity that only the rich could afford. This made the bulgur a very popular option and healthy one too. It is rich in fiber and provides good source of protein.
Bulgur Pilavi is one of the many great varieties of pilaf and is a common favourite dish among the Turks (and my family too !). Its a very healthy and delicious treat for the kids.
In making bulgur pilavi, red tomatoes, onions, green peppers, and other spices are usually added to the Bulgur and simmered in vegetable/chicken stock to make it wonderfully nutritious side dish.

Ingredients 

Bulgur (coarse grains) -300 gms
Onion - 1 (big and finely chopped)
Tomatoes - 2 (big)
Green Bell Peppers - 2 (cut in small cube sizes)
Red Bell Peppers - 2 (cut in small cube sizes)
Vegetable stock/chicken stock - 800 ml
Butter - 60 gms
Salt - use less salt, as the vegetable stock already has in itself salt content !
Pepper - add to taste

Preparartion

1. Soak the Tomatoes in hot water for about 15 minutes to remove their skin. The skin will peel off easily. Remove the seeds and cut each tomato into 6 parts.
2. Wash the bulgur and place it in a sieve for draining the water. Let it rest for few minutes in the sieve until all the water is gone.
3. Heat the vegetable stock.
4.  Heat 40 gms of butter in a non-stick pan. Saute the onions for about 5 minutes.
5. Add the bulgur and the rest of the butter to the onions and cook for about 3-4 minutes.
6. Add the chopped bell peppers, tomatoes, salt and pepper to the bulgur and mix well. Cook for 3 minutes.
7. Add the stock and let it boil. Reduce the flame and then cook for another 10 minutes by stirring regularly to avoid the bottom of the pan from getting burnt. When all the water from the bulgur-stock is gone, stop stirring it !
8. Remove the pan from the heat. Cover it with a Kitchen cloth and let it rest for 15 minutes.
9. Now mix and stirr the Bulgur Pilavi well and cover it again for 10 minutes before serving it.


In Turkey, Bulgur pilav is usually served with any variety of meat dishes such as kofte (meat ball), kebap (kebab), Yogurt and any casserole dishes. It goes extremely well with Patlican Salatasi.

Tip :
1. Use the olive oil (1/2 cup) alternative to butter if you are restricting your saturated fat intake.
2. This is a basic recipe, but feel free to add flavourings, such as thyme, bay leaves or pepper. Or add almonds or pine nuts to the bulgur for a more substantial dish.


This recipe goes to the event A.W.E.D Turkey, hosted by the the taste space, originally started by DK.
and to Iftar Moments by Taste of Pearl City.
It also goes to the event Dish Name Starts With B by Akila.


Tuesday, July 20, 2010

Lamb Yakhni Biriyani-dum in Oven!


Lamb Biriyani is an important Maincourse in Indian Cuisine especially among Muslim population. Be it an Eid festival or a wedding or a get-together or any special occassion, Biriyani is there ! The main ingredients being rice and Lamb/Chicken. There are different ways of preparing it depending upon the region where you come from and every house has a signature Biriyani.
Generally, the lamb pieces are cooked in an aromatic spicy Yogurt broth and this broth is called Yakhni. Then Yakhni is layered with cooked rice and is given to dum (steaming).  I used to give this dum over a normal hot plate until one of my friends gave me this great idea of giving "dum" in an oven! Believe me, it tastes wonderful with a typical smoky aroma which a characteristic of this Biriyani.
So here goes the recipe....

Ingredients 
For Rice
Basmati rice - 4 cups
Water- 5.5 cups
Oil - 1/2 cup
Cinnamon stick - 2 inch sized
Cardamom - 3
Mint leaves - 1/2 cup
Salt - according to taste
For Yakhni
Lamb - 1 kg
Oil - 1.5 cups
Onion (medium sized, sliced) - 8
Cumin seeds - 1 tsp
Ginger Garlic paste - 3 tbsp
Tomatoes (medium sized, chopped) - 4
Cloves - 3
Cinnamon stick -  2 inch sized
Green Cardamom - 3
Chilli powder - 1 tsp (use it according to your spicy taste)
Corriander powder - 6 tsp
Yogurt - 500 gms
Fresh Mint leaves - 1/ cup(chopped)
Fresh Corriander leaves - 1 cup(chopped)
Salt - according to taste
For Layering and Garnishing
Corriander leaves(chopped) - 1 cup
Nuts(Raisins, cashews, chopped Almonds, lightly roasted in a teaspoon of oil)- 20 gms each
Saffron or Food colorant- orange red color and/or yellow color dissolved separately in 1/2 cup of water
Lemon juice from 1 big lemon.

Preparation of rice
1. Cook the basmati rice in water together with the ingredients cinnamon, cardamom, oil, mint leaves, and salt. It is easier to cook it in an electric rice cooker.  If you wish to cook it in a normal pot, take care that you dont stir the rice often and that it is not burnt. The point is, the rice should be a little more than half-cooked and the grains are not broken !

Preparation of Yakhni
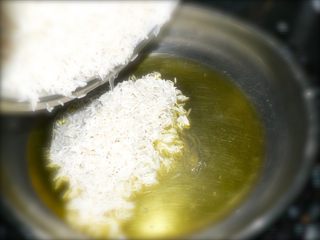
1. Heat the oil in a pressure cooker. Add cardamom, cinnamom, cloves, cumin seeds and saut the onions until golden brown.
2. Add the ginger garlic paste and keep stirring until it mixes with the onions and leaves the bottom easily.
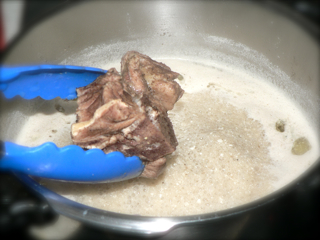
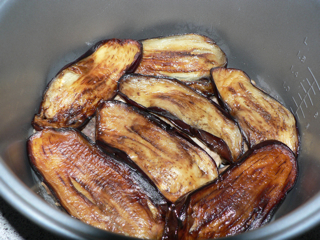
3. Add the lamb pieces and mix them well until they are covered with onions all over them. Fry for about 5 minutes.
4. Now add the tomatoes, chilli powder, salt, corriander powder, chopped mint leaves, corriander leaves and mix well. Cook for about 5 minutes.
5. Beat in and add the Yogurt. Mix well. No need to add water. Cover the lid and pressure cook until the lamb is fully cooked and is soft.
6. You will see a thick layer of oil on the top of the Yakhni. Do not mix the Yakhni now. Carefully remove the excess unhealthy oil from the surface using a big spoon. Then mix then yakhni well.

Final layering
1. Take a large tray preferably a deep bottom, suitable for use in oven.
2. Spoon the yakhni together with a few lamb pieces covering the bottom of the tray.
3. Then cover the yakhni layer with a layer of rice. Sprinkle the food colorants here and there. Add a tablespoon of corriander leaves, and sprinkle a tablespoon of lemon juice. Please do not mix the rice now.
4. Now comes the third layer of yakhni over it. No need to cover the rice layer completely. Just place it here and there.
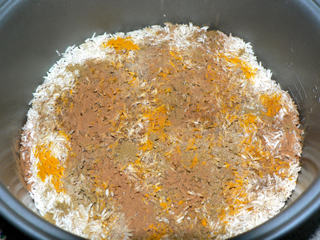
5. For the forth layer, add the rice and repeat the process of sprinkling food colorant, corriander leaves, and lemon juice.
6. Repeat the layering until all the yakhni and rice is used. If you find excess yakhni remaining, retain it in a fridge and you could use it as a gravy with breads and rotis for the next day !
7. Finish off this layering with the top layer being yakhni.
8. Cover the tray with an aluminium foil and place it in a preheated oven at 200 °C for 10 minutes.
9. Lower the temperature of the oven to 150°C and dum the Biriyani for another 10-15 minutes.
Garnishing
Just before serving,  mix the layers well and finally garnish with the roasted nuts and corriander leaves and serve warm with raita or Yogurt sauce.

Tips :
1.You could use many layers depending upon your depth of the tray used. But care should be taken to ensure that the first and the last layer should be a yakhni layer otherwise the rice may get burnt during dum !
2. Stays good for 2 or 3 days in a refrigerator.

Since Ramadhan, the most sacred and auspicious month for Muslims is nearing, its my pleasure to send this recipe to  Taste of Pearl City, of Umm Mymoonah who is hosting an exclusive event on Iftar Moments.


This recipe also goes to th global Ramadhan event Joy from Fasting to Feasting (Season - III)

Enhanced by Zemanta

Tuesday, June 29, 2010

Stuffed Tomato pots


If you are a rice-eater and are bored of serving the same things over and over again, here is a different way of presenting it. The good thing about this recipe is you could use a variety of combination of vegetables with the rice ! There are not much spices involved, the natural flavor of olive oil is sufficient enough to give a rich taste. I generally use olive oil in most of my cooking for its health benefits . Here in this recipe, I have used Minced Meat to give a stomach-full feeling.

Ingredients for 4 persons
Tomatoes (Big and Ripe, and preferably thick skinned) - 8
Onion -1 (chopped)
Minced meat - 150 gms / small cut vegetables of your choice
Raw Rice - 100 gms
Olive oil - 2 tbsp (you could as well use any other sunflower oil)
Salt
Pepper
 
Preparation
1.  Wash the Tomatoes. Take out the pulp using a spoon and collect it in a bowl.
2. Now, prepare the Stuffing by heating the olive oil in a pan and saut the onion until transparent.
3. Add minced meat, raw rice, half of the tomato pulp, salt and pepper to it and fry for 2-3mins. Add 1 cup of water(or more depending on your rice) and cook it until the rice is done and the stuffing is water-free.
4. Stuff the prepared rice into the Tomato pots and place them in a greased tray.
5. Preheat the oven to 180°C and bake the pots for about 30-35 minutes.
Tips : Serve it with raita or Yogurt and a Salad.
           Preserve and save the rest of the Tomato pulp for other use.